The Costpoint Word Template add-in for Office 365 GCC High is included with your Costpoint installation.
Follow the steps below to deploy the add-in as an application into Office 365 Portal for the company. After the Costpoint Word Template add-in is deployed, the users or groups that were selected in the deployment wizard can install the add-in in MS Word.
To deploy the Costpoint Word Template add-in:
-
Open the
Microsoft 365 admin center.
-
On the left pane, click
.
-
On the Add-ins screen, click
Deploy Add-In.
-
On the Deploy a new add-in screen, click
Next.
-
Click
Upload custom apps.
-
Enter the URL for the manifest file: https://<app_server>/CPWeb/word/manifest.xml, replacing <app-server> with your app server name.
-
Click
Validate.
Note: If the page fails to accept the link, open the manifest URL in a separate browser tab and use the
Save As
browser option to save the manifest to a file. Then use the
Choose File option to deploy.
-
Click
Next and add the users or groups who will use the add-in.
-
Click
Next to progress through the wizard and then click
Done.
The Costpoint Word Template add-in is deployed to your computer.
-
Next, install the Costpoint Word Template add-in in MS Word:
-
Open MS Word and click the Insert tab.
-
On the Insert tab, click
My add-ins.
-
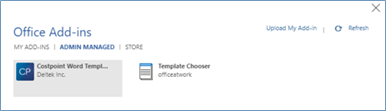
Click the Admin Managed tab and select
Costpoint Word Template. Click
Refresh, if necessary, to see the add-in.
-
Click
Add. The Costpoint tab displays in MS Word.